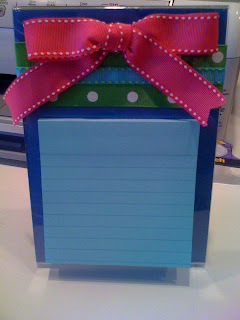
Two apologies right off the bat can't be good right?
1- Sorry for the crummy pics. That's what I get for only taking pictures of these with my phone. Boo.
2- I didn't take "during" pics. I only have finished product pictures, so you'll kinda have to listen to me explain!
I did NOT come up with this idea. Go visit Beneath My Heart for a FABULOUS tutorial on how she did them! Even if you don't want to know how to make them, go there anyways, cause she has lot's of great ideas!
I did a whole bunch of these bad boys for Christmas this year. They were fast, easy & cheap to make! Can't go wrong with that combo!
All you need for these (which are great for throwing in your purse) is...
-cardstock
-ribbon or other scrapbooking paper
-embellishments
-hot glue / glue gun
-velcro "dots"
Cut your cardstock a tad bigger than the width of your post it notes.
Then you're basically going to fold the cardstock up over the bottom of the post its, and then the top part down over the top. Kinda like you'd fold a piece of paper to fit it in an envelope.
You don't have to crease the paper, it'll lay right after you close it.
Now you can hot glue your post it notes to the middle of the piece you cut out!
I chose to embellish with ribbon, pearls, buttons, initials and furry flowers, but you can easily use different scrapbook papers as well! It's totally up to you!
Then, using your velcro dots, keep them attached to one another.
Remove ONE of the protective backing from one of them and stick to the under side of the TOP of the post it cover. Now remove the protective backing from the other side, and close your cover and TA-DA, now your cover is complete!
These are even easier to do than the above ones!
Here's what you need...
-4x6 or 5x7 plastic picture frames (these are super cheap anywhere!)
-Post it notes
-Ribbon or any other embellishments you want
-Cute paper
-Glue
Cut your paper of choice the size of the insert (4x6 etc.)
Slide it in the frame *I put a few little dots of glue to keep it secure*
Attach the post it's. I used a little bit of hot glue, but really all you have to do is remove the very last paper off the stack and stick it on!
Embellish however you wish!
For presents, I just wrapped a few together and tied with a bow!
Easy Peasy!!
I'm linking to these parties!!


5 comments:
Those turned out really cute! Thanks for recommending the site.
Oh my! You took my craft up a notch! :) Fabulous! I love the fun ribbons and embellishments you used. So cute. Thanks for linking back to me and letting me know about your post. I love visiting my readers!
Blessings!
Traci
Tori,I wondered where you found the cute and fancy cards you gave me for Christmas. How do you find time to do your pretty art work with so much work you have to do everyday. You are so talented. Hope the family is feeling alot better now. Have a good time using your talents.
love these! I'll make some up for easter gifts for teachers.
Those are toooo cute Ÿ
Post a Comment